
An Account corresponds to the billing accounts in your system, such as billing routes and meter information. A Property is the physical location where the Subeca device is installed, such as the address. A Customer is your end customer, with details such as their name and contact information. Within Engage, Accounts are required, while Properties are strongly recommended, and Customers are optional.
Navigating to the Engage Utility Portal
1. Access the portal
Open the Engage Utility Portal by navigating to the following URL: https://utility_name.subeca.online/
2. Log into the Administration Section:
Once on the portal, click on Administration in the main menu.

3. Find Customer Accounts
Under the Administration tab, select Customer Accounts.
Click on Customers to view the list of customers.


Creating and Editing Accounts
4. Creating an Account
Select Add New Account
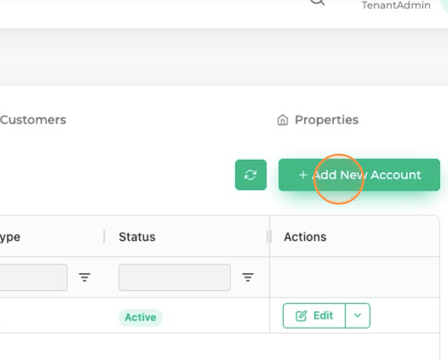
- Fill out required details
- Account ID (alphanumeric)
- Meter Manufacturer (E.g. Neptune)
- Meter Model (E.g. T-10)
- Meter Size (E.g. 2)
- Optionally fill out:
- Route
- Customer (pick)
- Property (pick)
5. Deleting an Account
Click Edit then Delete
Creating and Editing Properties
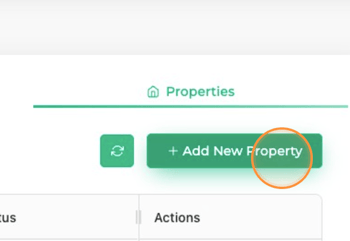
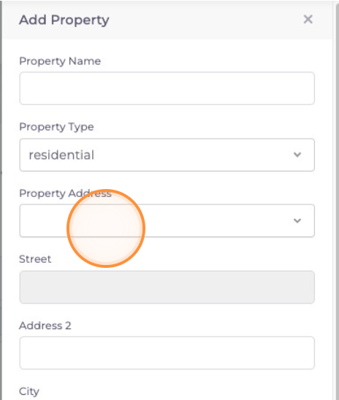
6. Creating a Property
Choose Add New Property and fill out fields.
Note: Certain address details will auto-complete when you start typing in the Property Address field.
7. Deleting a Property
Click Edit then Delete
Creating and Editing Customers
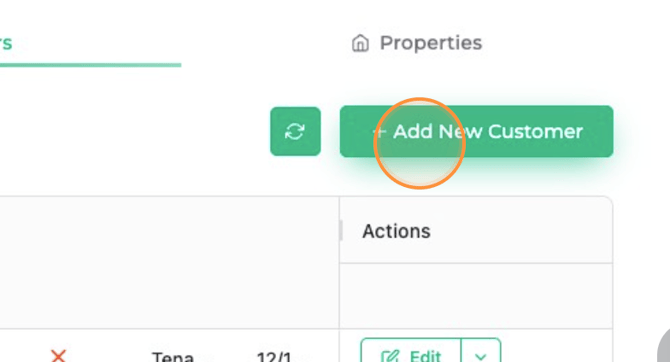
8. Creating a Customer
Choose Add New Customer and fill in details.
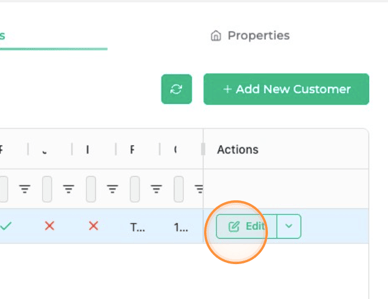
9. Edit Customer Details
Click on Edit next to the relevant customer to bring up the update form.
Enter the correct customer information into the form fields.
10. Deleting a Customer
Click Edit then Delete
Overall Editing
11. Resize columns for Better Visibility
If needed, resize the columns by clicking this resize icon for better visibility of the customer details.
12. Save Changes
After entering the updated customer information, click Update to save the changes.
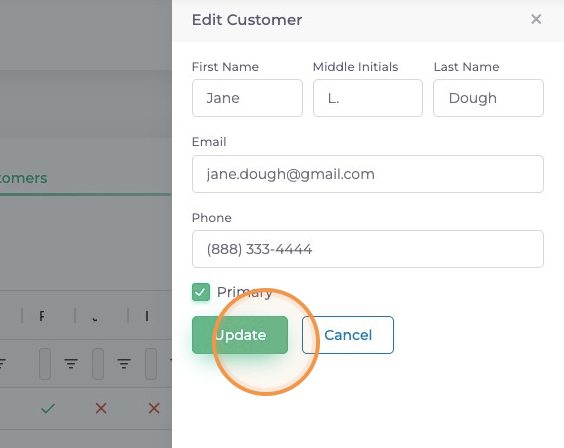
13. Click OK to complete the update.
